3D Lenticular printing has become more affordable because of the ever-lowering prices of digital printing equipment found in homes and offices. There are many downloadable software products on the market designed for this special form of printing; some are free, and some for a medium to high price. By and large, these products serve one main purpose: i.e., to interlace pictures to be viewed through lenticular sheets.
This article tries to demystify the underlying working of interlacing software. By understanding how pictures are interlaced and then combined, you will be able to appreciate the principles of lenticular printing better. This knowledge will also help you identify with the terminology used in many other software products.
On YouTube and other platforms, you'll find many tutorials on creating 3D lenticular prints. Some are excellent; others, less so. Most focus on how to follow the steps, but never explain why those steps matter. We believe understanding the "why" is just as important as knowing the "how."
In this guide, we walk through a real-world example of interlacing a 3D lenticular print-without relying on ad hoc software-so you gain a clear understanding of the underlying principles. This hands-on project is designed to help you create genuine lenticular prints using a home computer and a desktop printer.
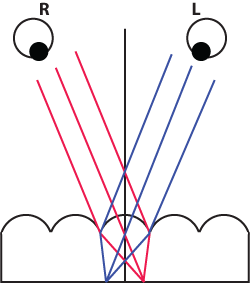
A brief review here will help lay the foundation for further discussion.
The principle behind 3D lenticular printing is binocular disparity. When we view an object, our left and right eyes each see a slightly different image. When the brain combines these two views, it creates the perception of depth.
In traditional printing, visual information is limited to left-right and up-down dimensions; depth (in-and-out) information is lost. To recreate this sense of depth, we must present the same object with a slight binocular disparity-allowing each eye to see a different view-just as illustrated in the image on the right.
A lenticular sheet serves exactly this purpose. When the image behind the sheet is carefully sliced and interlaced, certain image strips are directed to the left eye while others are directed to the right eye. The brain then combines these two slightly different views, creating the perception of depth.
If you are interested in going deeper into the theoretical aspect of this field, you can find good articles in the References section.
Although you can simply read through this article from the beginning to the end and still be able to understand most of it, we do recommend that you go through the steps to create an actual print. Knowing the nuts and bolts of how an interlacing program works will give you the confidence to make good lenticular prints for your future projects. On top of that, it is fun.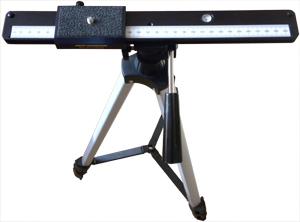
The items you need for our tutorial include:
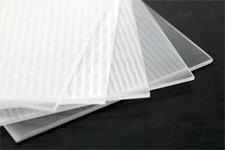
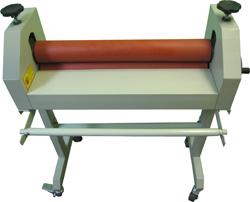
You can skip items #1 ~ #3 by using the pictures we provide in this article. But if you really want to take pictures of your own and cannot find the slider bar, consider tying your camera to a 1/18th scale die-cast toy car which can move along on flat a surface smoothly. If you choose this option, try to find a ruler with an air bubble leveler so you can assure the surface is flat. The scale on the ruler will also let you gauge the distance travelled by the toy car for successive pictures. Although this setup looks very unprofessional, it does work.
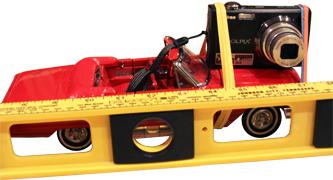
If your camera has a remote controlled shutter then use it. Otherwise try to make sure the camera is not shifted downward when you press the shutter button.
For the graphics editing program we strongly recommend using GIMP because it is totally free and it is just as powerful as Photoshop. Albeit, we will use Photoshop in our example for the reason that it is more popular. Other programs such as Ulead Photo Impact or Corel PaintShop Pro are good alternatives too.
 Preparing the pictures
Find an object which has in-and-out distance inherently, for example, a potted plant as in our case. You can also arrange objects so that some are closer to the camera and some are farther away.
The idea is to take a sequence of pictures along a straight line. How many pictures do you need to take? Here is the very simple formula.
N = RPR / RL
Where N = Number of consecutive pictures to be taken
RPR = Resolution of your inkjet or color laser printer
RL = Number of lenticules per inch of the lenticular sheet you are going to use
We will explain this formula in greater detail in the next section. But for now, just take it as it is. For example, Epson advertises that its Photo printers can print in 360 dpi, 720 dpi, and 1440 dpi. Let's say we want to go for 720 dpi with a lens pitch of 40 lpi (lines per inch). Using the formula, the number of pictures will be (720 ÷ 40 = 18).
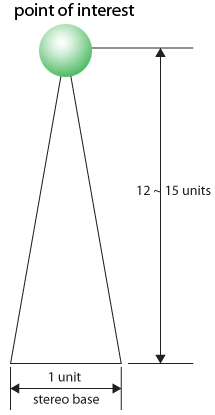
There is also a rule of thumb of 15:1 which tells us how far apart each picture should be. If the object of interest is 15 units from the camera, the total displacement from the first picture on the left to the last picture or the right, or the stereo base, should be about 1 unit. For example, if the object of interest is 1.5 m (150 cm) from the camera, the stereo base should be about 10 cm. If we need to take 18 pictures, the distance between each step will be (10 ÷ 17) cm or about 6 mm. But if we decide to take only 9 pictures, then the increment will be (10 ÷ 8) cm = 12.5 mm. We can reduce the distance from the point of interest to camera from 15 units to 12 units if we want to have a deeper parallax, i.e. more exaggerated 3D effect. But remember this rule is just an empirical formula and it is not absolute. You should make your own judgement based on the scene you have chosen. In theory, the farther the object from the camera, the bigger the stereo base should be. If you choose a big stereo base for a near object, the 3D effect will be more strong but meanwhile the picture will be more fuzzy.
You can download the 18 3D footage (32 MB) from our archive.
Recapping the formula
N = RPR / RL
Where N = Number of consecutive pictures to be taken
RPR = Resolution of your inkjet or color laser printer
RL = Number of lenticules per inch of the lenticular sheet you are going to use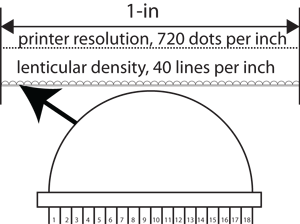
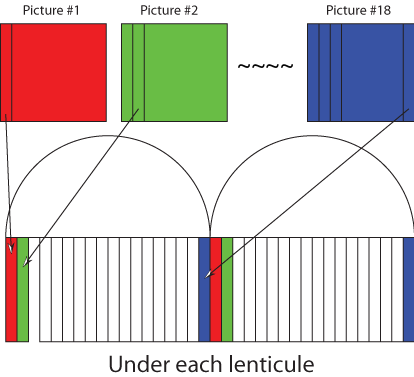
Looking at the picture on the right will give you a clear idea. If the printer can print 720 lines per inch and there are 40 lenticules per inch, the formula is telling us that under each lenticule there will be 18 lines. These 18 lines will be the aggregate of the 18 pictures we have taken with each picture contributing one pixel. In other words, for the final interlaced picture, column number 1, 19, 37, .........etc will come from the 1st, 19th, and 37th column of picture #1, and column number 2, 20, 38, .........etc will come from the 2nd, 20th, and 38th column of picture #2. In general, column number k, (k + 18), (k + 2 x 18), .........etc will come from the kth picture.
For computer programmers who want to write Photoshop action script, Photoshop plug-in, GIMP Script-Fu or GIMP plug-in, this information is crucial for the interlacing algorithm. Assuming your program will present a dialog to the users to collect the printer resolutions and number of pictures to be taken, you will need to loop through the pictures and for each picture to loop through the correct column intervals for extracting the stripes corresponding to the specific picture. The pseudocode of your program will look like
Remainder = RPR % RL
		IF Remainder != 0 THEN prompt user for correct number of pictures
		ELSE
		 DO
		  N = RPR / RL
		  Steps = (Picture Width) / N
		  FOR i = 0 TO (N - 1)
		   FOR j = 1 TO (Steps - 1)
		    Extract column (i + j * N + 1) of picture i
		    Insert the extracted column into column (i + j * N + 1) of interlaced image
		   END FOR j
		  END FOR i
		 END DO
		END ELSE
Ideally the more pictures, the smoother the final image will be. But if you have less than 18 pictures then you can scale down any number of pictures as long as it is an integer.
Equipped with all the information we have so far we can start the actual work.
Step 1.
Create a new Photoshop file with the same size as the pictures taken. Cut and paste the pictures into Photoshop in the right order with the first picture as the bottom layer. Make sure the order is correct.

Step 2.
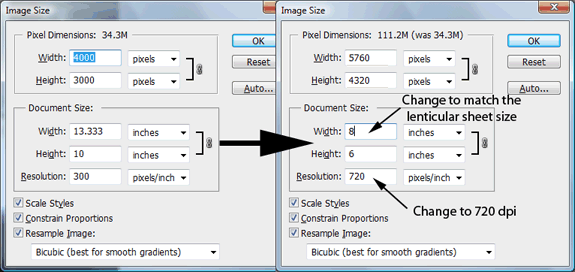
Resize the image to 720 dpi, the resolution of the inkjet printer. Also adjust the final printed size to a reasonable dimensions, say 8-in across to fill almost the width of a letter size paper. But remember, this size is still not final as we will need to crop the image later to account for the binocular disparity shift.
Step 3
Adjust the level of individual layer to make them more consistent. You do not want the final print to be brighter from one angle and darker from the other unless that is intentional. If you can avoid using flash light during the shooting then most likely you can skip this step. Try to shoot your pictures under natural sun light but not in the middle of the day when the sun is too strong.
Step 4
Identify a spot or area on each layer that should be aligned to the same coordinate. This step is so important and the success or failure of the print has a lot to do with whether this step is done correctly or not.

In Photoshop, we can work from the lowest layer up. First turn off the visibility of all layers except the lowest and the one layer above it, i.e. Layer 1 and Layer 2. Then highlight Layer 2, adjust the [Opacity] of Layer 2 to about 50% making it semi-transparent. Use the [Move] tool to move Layer 2 so that the pot in Layer 2 is superimposed on the pot in Layer 1. Once done with Layer 2, adjust its opacity back to 100% and then turn on the visibility of Layer 3 to repeat the same procedure. When Layer 18 is aligned with Layer 17 then this tedious task is done.
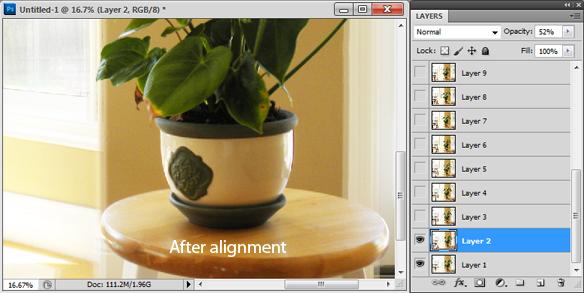
Step 5
Once the alignment for the total 18 layers is done you will notice that layer 18 has shifted quite a lot to the right. Now you can use the [Crop] tool to resize the picture
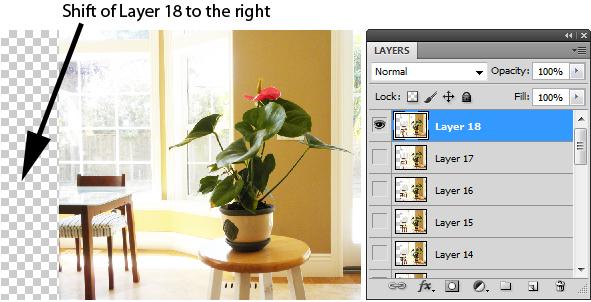
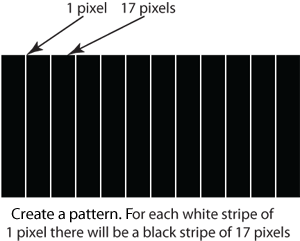
Step 6
Create a new file with the same width and height as the just cropped image. On the new file, create a black and white pattern with one white stripe for every 17 black stripes. Repeat this pattern to fill in the rest of the area. The white stripes in this file represent the columns from one of the pictures that will be used in the final aggregated interlaced image. The black wider stripes represent the area that will be seen through.
Step 7
Choose [Select > All] or press [Ctrl-A] to put the pattern into the clipboard.
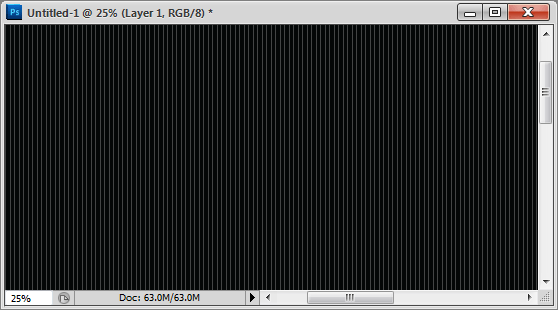
Step 8
Turn on the visibility of each layer and create a layer mask for each of them.
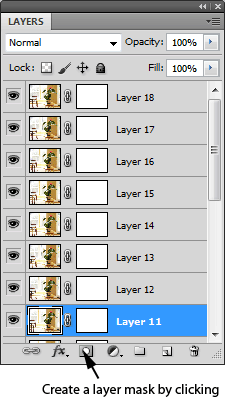
Step 9
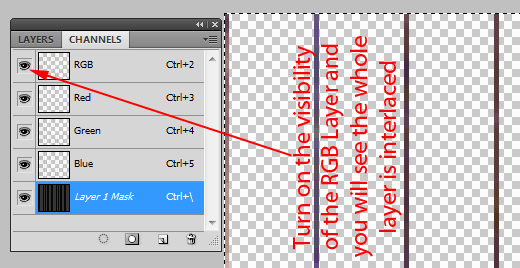
Click on the [Channel] tab on the [Layer/Channel] palette. Highlight and select the Layer Mask layer and turn on its visibility. Temporarily turn off the visibility of the RGB layer. Paste the content in the clipboard into the Layer Mask layer. Use the [Magnify] tool to zoom on the left edge. Choose the [Move] tool from the tool box if necessary to align the pattern so that the first white stripe for Layer 1 starts at column 1. Turn the visibility of the RGB layer back on and you will see the 17-pixels apart 1-pixel stripes has been created. Repeat the same procedure for the rest of the layers. For example, align the first white stripe of Layer 2 to start at column2, the first white stripe of Layer 3 to start at column 3, so on and so forth.
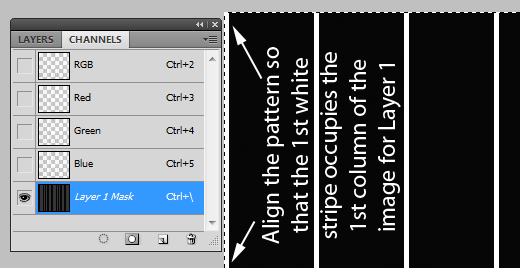
Alignment of the mask for Layer 1
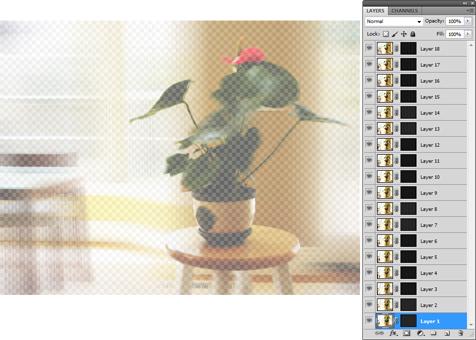
As the result of these steps, the final interlaced picture is shown as below.
Step 10
Merge the layers, crop it to a more suitable size and the file is ready to be printed.

The final result of the interlacing
As a result of all the above exercise, the final picture will be the union of 18 pictures such that each picture contributes only the right column as shown below. In the picture we use red to represent the (18k +1)th column, green to represent the (18k +2)th column, and blue to represent the (18k + 18)th column, where k = 0, 1, 2, ......, (int (width of picture / 18) - 1).
Step 11
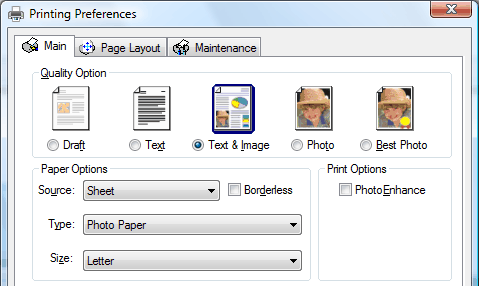
Print the file to your inkjet printer. If you use Epson, chose the Text and Picture option from the preference dialog which maps to the 720 dpi.
Step 12
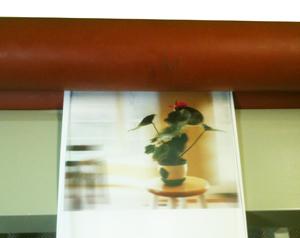
Laminate the lenticular sheet on top of the printout using a cold laminator and voila!
What we have shown so far are the fundamentals. In reality, professionals in the industry probably would not create lenticular prints this way. They would most likely use ad hoc software. Listed below are some of the software we have used.
If you are software maker and would like to have your software listed here. Please send us a fully functional copy for evaluation.