We have explained on a few occasions that lenticular printing is based on the principle of binocular disparity. Theoretically, we only need a stereo pair or two pictures, one for the left eye and one for the right eye, to create the disparity for 3D perception. But in reality, high-quality 3D lenticular prints will require more than just two pictures for creating a realistic 3D perception and a smoother 3D viewing experience. In this article, we will present different ways to obtain source pictures for excellent lenticular 3D printing.
- By 3D modeling
Programs such as 3dsMax, Bryce, LightWave 3D, Maya, etc can create 3D images by modeling. Once 3D objects are modeled by these programs, you can use the virtual camera function in these programs to take a series of pictures for these 3D objects as if these images were taken by a real camera that was mounted on a slider. Sequential pictures taken this way will have the same effect as if pictures are taken from real objects put on a real stage.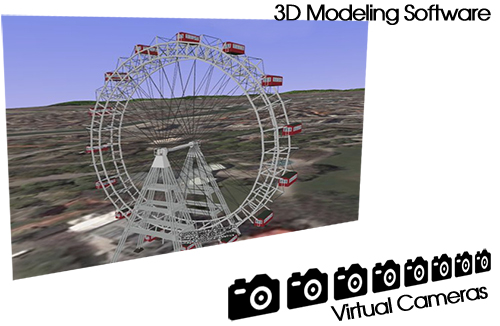
3D Modeling This type of simulation is the most economical way to build a rich 3D objects library for any artwork composition. For example, it will be very difficult and expensive to take a series of pictures of a live sea turtle swimming in the ocean.
- By taking actual pictures
This is the traditional way of getting stereo pictures. A series of pictures can be taken by a single camera which is set up to slide along a slider bar or multiple cameras can be mounted along a straight line or a curve. The challenge with the single-camera setup is that the objects need to be 100% still when the camera moves along the slider. For multiple camera setup, the cameras’ shutters need to be synchronized.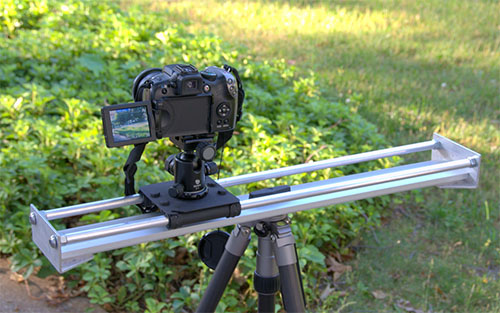
Single camera for stereo photography - By converting a single 2D image for 3D lenticular printing
As an alternative, images required for 3D lenticular printing can be obtained by layering 2D pictures in Photoshop and moving the objects left or right to create the necessary binocular disparity. People find this approach more practical because 2D pictures are more accessible. With this approach, the distance between layers can be easily manipulated. Objects on a specific layer can also be 3D’ed with either depth map or equal-distance slicing. Photoshop has its depth map functions to enhance the 3D depth in its layers. For example, a depth map can be created for a 2D tennis ball to have the sphere look. On a grayscale depth map, the lighter color represents points that are closer to the viewer, and the dark color represents points farther away from the viewer.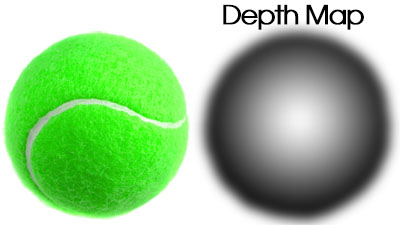
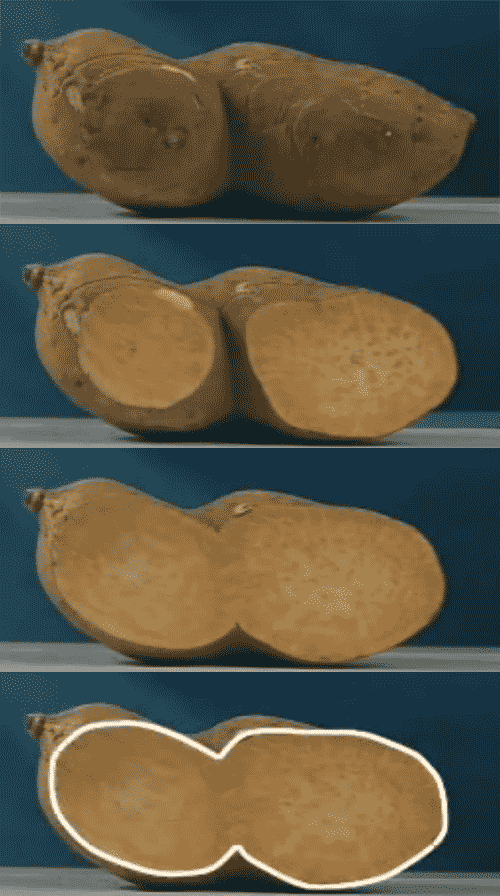
depth map for 3D The equal-distance slicing method is similar to the isobars on a weather map. For example, the yam in the following picture is sliced into pieces and the perimeter of each slice represents the locus of points with equal distance to an imaginary plane parallel to the face of the slice.
Both depth map and isobar approaches are used in some ad hoc lenticular printing software. They both provide very intuitive concepts to add depth to objects. But in terms of convenience, the isobar approach is easier. Creating a workable depth map can be tedious and requires a great deal of experience.



That’s a very interesting idea. Do you know the name of software that uses the isobar approach?
As far as I know the PSD 3D Converter, http://www.3dphotopro.com/soft/psd_3d_converter.html, uses the depth map. But I agree that slicing is more intuitive and convenience.